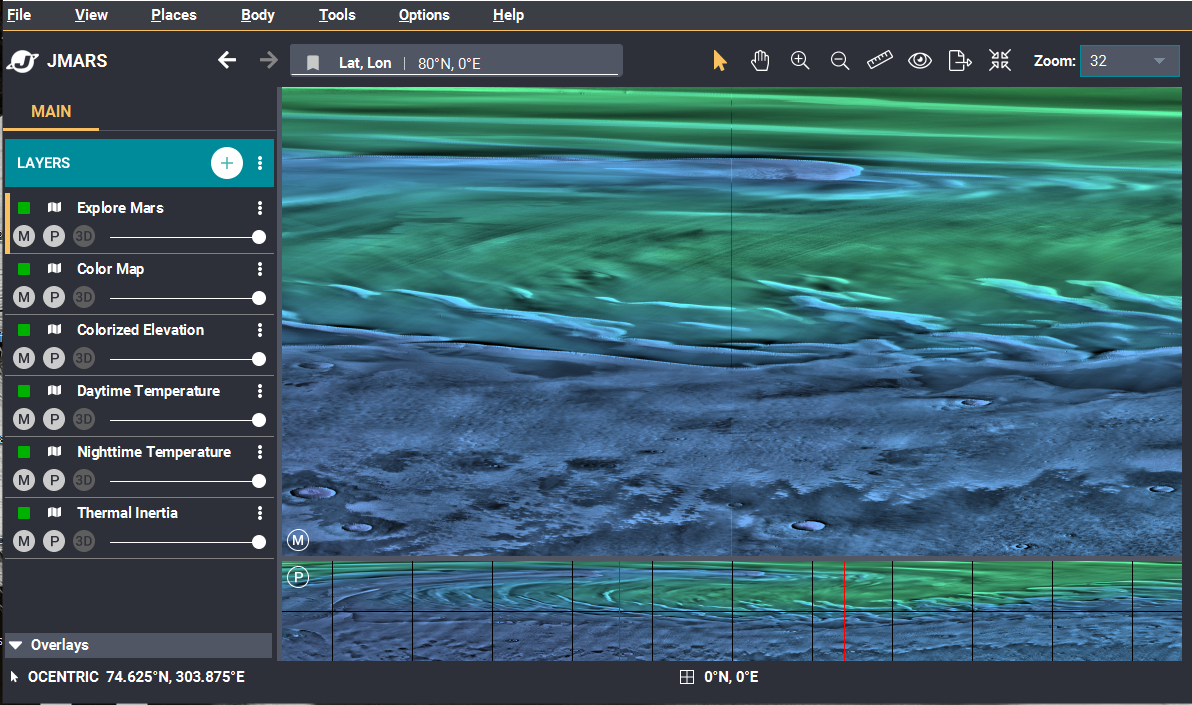
The Viewing Window displays the visual information contained in the open layers and consists of two views: the Main View and the Panner View.
- The Main View is the primary display for the visual data contained in the open layers. By adjusting the transparency of the layers in the Layer Manager, multiple layers can be displayed simultaneously. Users can navigate in the Main View by clicking and dragging with the center mouse button.
- The Panning View is a wide-angle view of the area displayed in the Main View and provides the user with a sense of context. Users can navigate in the Panning View by either clicking and dragging with their center mouse button or by left-clicking on the map. Clicking in the Panner view will re-center both the Main and Panning Views on that point.
The Viewing Window also displays some basic parameters:
- Resolution: The "zoom" of the visual data being displayed is given in units of pixels per degree (ppd) and can be set to a variety of values between 1 and 32768.
- Latitude and Longitude: The Viewing Window gives the latitude and longitude in multiple areas. On the top-left of the window, the latitude and longitude of the center of the Main View is given. The user can also navigate to other locations by manually entering the desired values. On the bottom-left of the window, the latitude and longitude of the cursor location is given. The location at the bottom-center of the screen is the center projection.
- In both cases, the location is given as East Longitude and North Latitude. West Longitude and South Latitude can be entered either with a negative sign or by specifying "W" or "S" after the numerical value. (Ex: 10 West Longitude can be entered as either "-10", "-10E" or "10W".)
- Toolbar: The toolbar has several options, including zooming, panning, an investigation tool and even high resolution export.
The Viewing Window has many other functions that can be accessed using the menu options at the top of the window.
Under the "File" Option:
- Save, Save As - saves the current JMARS session to a session file. For more information, see Session Files.
- Select Startup Layers - Allows you to select layers from your layer manager that you want to be loaded every time JMARS is opened.
- Save Layers, Load Layers - saves/loads individual layers to/from a layer file. For more information, see Layer Files
- Capture to JPEG, Capture to PNG - takes a screenshot of the current Main View and saves it to a file.
- Load Layers - Load saved layers that were previously saved out.
- Load Session - Load a saved session
- Open Custom Map Manager - Open the Custom Map Manager to access and upload custom maps.
- Export at High Resolution - Export a higher resolution map
- Export Georeference Data and Tiff - Export a Tiff and a world tiff at once.
- Export - Export the main view with a choice of output.
- Exit - exit the JMARS application
Under the "View" Option
- Dock Layer Manager - docks the Layer Manager window to the Viewing Window
- Panner View Checkbox- displays the Panner View at the bottom of the Viewing Window
- Memory Meter Checkbox - displays a memory usage meter at the bottom-right of the Viewing Window
- Tool Tips - allows users to enable/disable all mouse tool tips
- Navigation - these options give users the ability to jump North, South, East or West and to Zoom In and Out
- Default Time Format - changes the format JMARS uses for displaying times and allows users to specify times according to other spacecraft clocks; for more information of time formats, see the Time Formats page.
- Re-Center the Projection - allows users to re-center the current map projection in the Main and Panning Views. For more information about re-centering projects, see below.
Under the "Places" Option
- Previous Place - allows users to go to the previous lat/lon location they were at
- Next Place - allows users to move to the next location. This tab will only be activated when the previous place tab is used or the recent tab is used
- Recent - allows users to look at a list of previous locations
- Restore Zoom on Selection - will re-zoom the Viewing Window to the zoom that was used when a place was bookmarked
- Restore Projection on Selection - will reproject the map to the projection that was used when a place was bookmarked.
- Export to CSV Export the data in a CSV Shapefile
- Bookmark Current Place- allows the user to save the current location. Any previously saved place will also be displayed here.
Under the "Body" Option
- Select Body - Switch bodies.
- Reset Layers - resets to the default JMARS view with the Lat/lon grid and the default MOLA Shaded Relief Layer
- Reload Saved Layers - will reset to the saved layers that was loaded into JMARS
Under the "Tools" Option
- The tools tab allows the user to active different buttons on the toolbar. The User can either use this pull down method and select the Checkbox they would like or select the individual buttons on the toolbar.
Under the "Options" Tab
- Hide M and P icons: Turns the main view and panner view icons off.
- Autoclose Add Layer:When selected, the Add Layer dialog will close every time a layer is loaded.
- Manage File Cache:Clean cache out.
- Set default web browser:Custom set the web browser that you prefer.
- Coordinate Order:This allows coordinates in JMARS to be viewed at Lat, Lon or Lon, Lat
Under the "Help" Option
- Check for Updates - Check to see if you are running the latest version of JMARS.
- JMARS Homepage - A direct link to the JMARS Homepage.
- Video Tutorials - A list and link to the latest video tutorials.
- Forums - opens the JMARS help forums, where users can request and/or provide assistance related to JMARS
- Release Notes - opens the notices associated with past and current versions of JMARS
- View Log - view the verbose output from your JMARS JAVA session
- Report a Problem - sends your current log and user comments to the JMARS team
- About - displays information about the current JMARS version
The Viewing Window also allows users to re-project the maps being displayed. By default, JMARS opens with the maps centered and projected at 0E,0N. This means the map will appear correctly proportioned at this point, as well as any point directly east or west of it on the equator, but will become distorted at points north and south of it. (This Cylindrical Projection is the same type of projection used to create rectangular maps of the Earth.)
- Re-Center the Projection: Users can re-project the maps with the center of the Viewing Window as the new center-point. This will eliminate any distortion at that point and present the given area as it should really appear. To do so, click on "View" -> "Re-Center Projection" in the Viewing Window.
- Return to the Default Projection: To return the Viewing Window to its default projection, type "0E, 0" into the "Lon,Lat" box and then re-center the projection at that point.
Below are screenshots of 0E, 80N. The top screenshot is what the location looks like when the map is projected about 0E,0N and the bottom screenshot is how the location looks when the map is re-projected about 0E,80N. You can see there is much less distortion in the re-projected image.