- Home
- Getting Started
- Documentation
- Release Notes
- Tour the Interface
- Tour the Layers
- JMARS Video Tutorials
- Lat/Lon Grid Layer
- Map Scalebar
- Nomenclature
- Crater Counting
- 3D
- Shape Layer
- Mosaics
- Map
- Advanced/Custom Maps
- Graphic/Numeric Maps
- Custom Map Sharing
- Stamp
- THEMIS
- MOC
- Viking
- CRISM Stamp Layer
- CTX
- HiRise
- HiRISE Anaglyph
- HiRISE DTM
- HRSC
- OMEGA
- Region of Interest
- TES
- THEMIS Planning
- Investigate Layer
- Landing Site Layer
- Tutorials
- Video Tutorials
- Displaying the Main View in 3D
- Finding THEMIS Observation Opportunities
- Submitting a THEMIS Region of Interest
- Loading a Custom Map
- Viewing TES Data in JMARS
- Using the Shape Layer
- Shape Layer: Intersect, Merge, and Subtract polygons from each other
- Shape Layer: Ellipse Drawing
- Shape Layer: Selecting a non-default column for circle-radius
- Shape Layer: Selecting a non-default column for fill-color
- Shape Layer: Add a Map Sampling Column
- Shape Layer: Adding a new color column based on the values of a radius column
- Shape Layer: Using Expressions
- Using JMARS for MSIP
- Introduction to SHARAD Radargrams
- Creating Numeric Maps
- Proxy/Firewall
- JMARS Shortcut Keys
- JMARS Data Submission
- FAQ
- Open Source
- References
- Social Media
- Podcasts/Demos
- Download JMARS
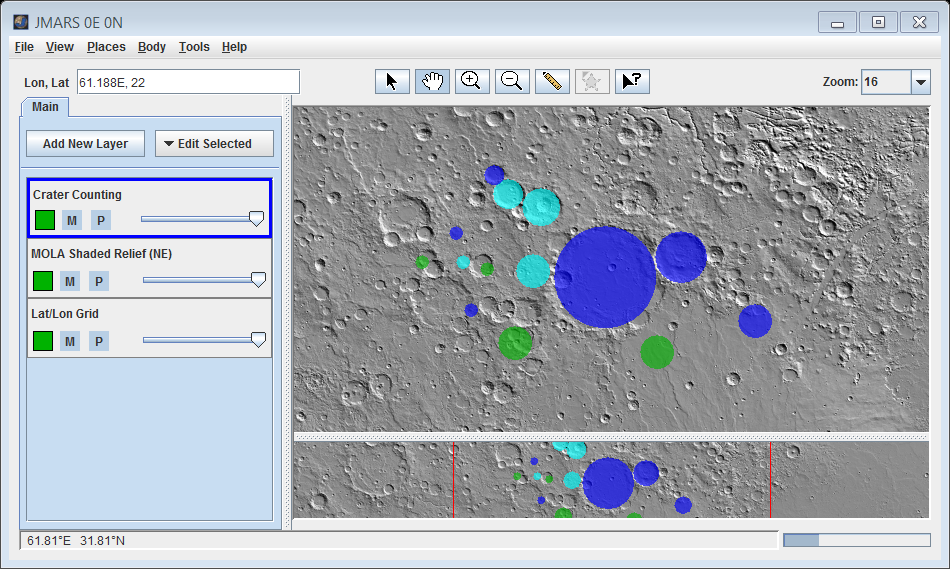
Crater Counting Layer
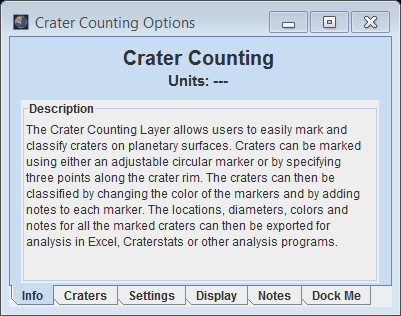
The Crater Counting Layer allows users to mark craters and then output the locations, diameters and other associated data to shape files in various formats. This data can then be used for regional-scale studies or combined with similar data from multiple users to enable global-scale crater studies.
Marking Craters
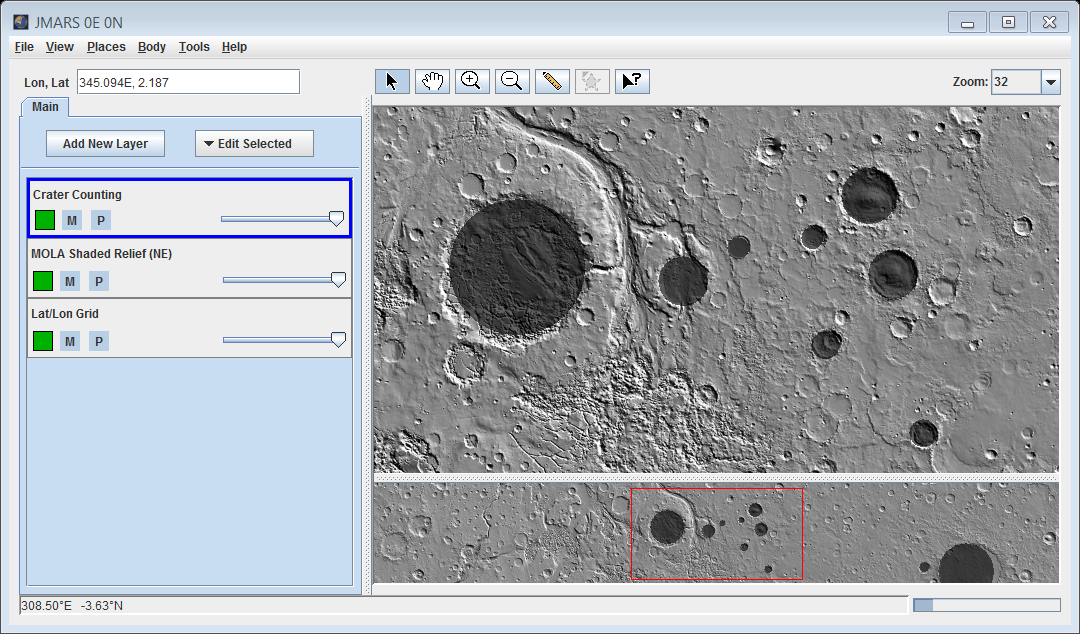
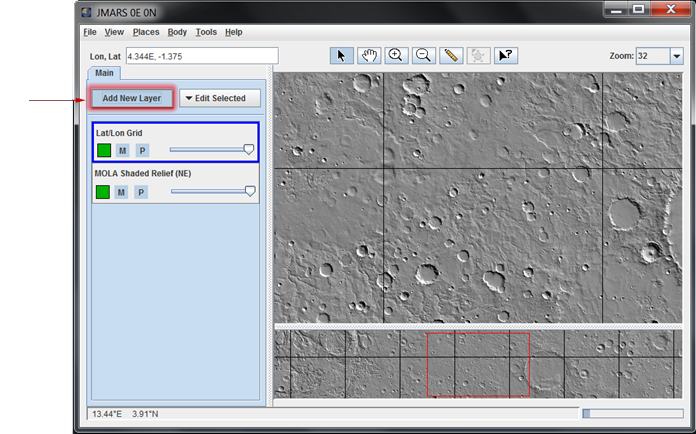
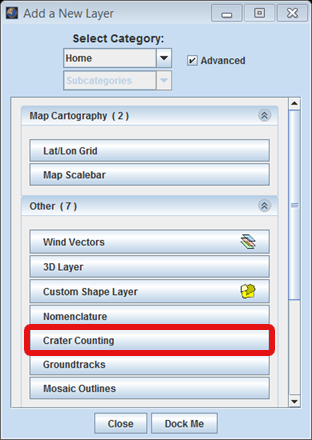
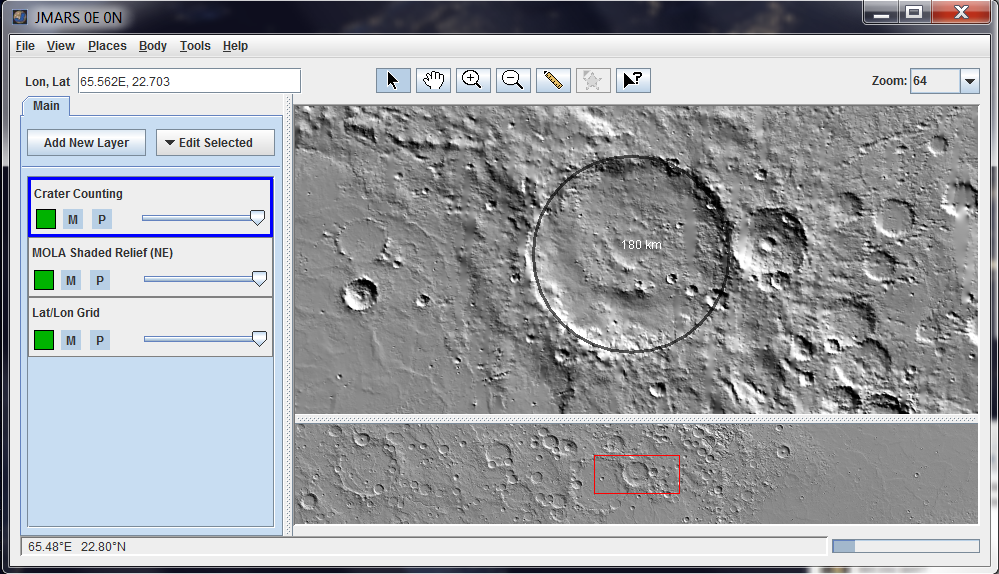
- Open the Crater Counting Layer: In the Layer Manager, click the "Add New Layer" button and select "Crater Counting".
- Select the Crater Counting Tab: If the user double-clicks on the "The "Crater Counting" layer, details and options for the layer appear.
- Choose a Crater to Mark: Users should adjust the resolution (using the pull-down zoom menu at the top-right of the Main View) and pan around in the Main View as needed to find a crater they want to mark.
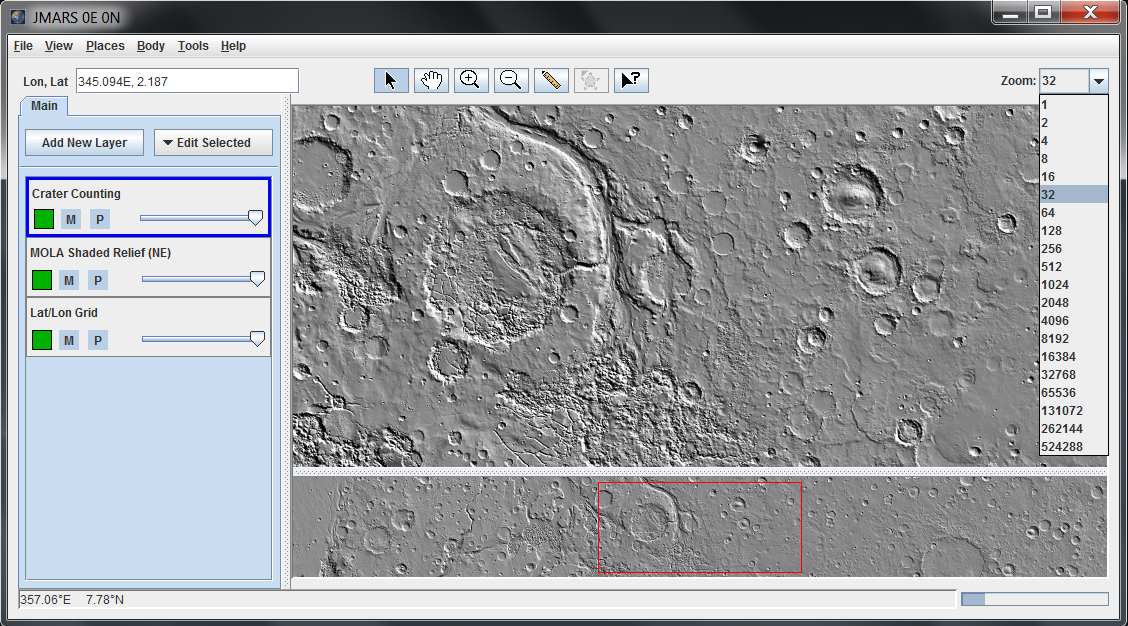
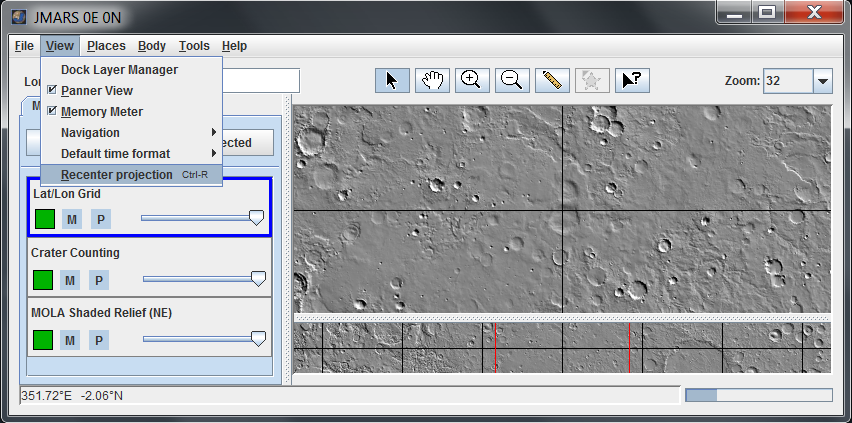
- Recenter the Map Projection: In the Main View, choose "View" from the menu bar and then select "Recenter projection"
- The Crater Counting layer will only draw circles. However, if users move too far away from the center of the current map projection, circular craters will appear increasingly non-circular. To ensure the correct diameter is being chosen, users should re-center the projection whenever they pan away from the last point they centered over. This is especially important as users move to higher latitudes.
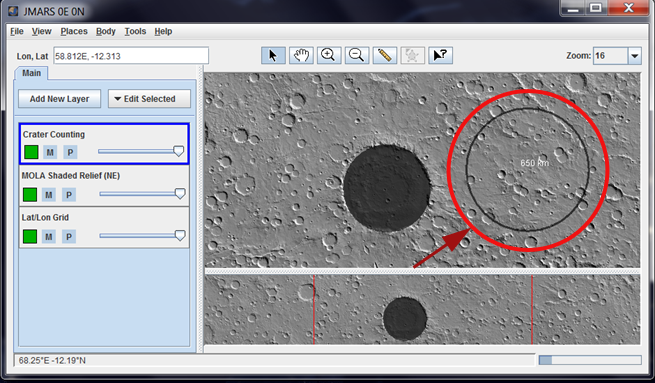
- Set the Crater Diameter: A semi-transparent black circle will appear under the mouse cursor in the Main View. Users can adjust the diameter using the center scrollwheel on their mouse.
- The default diameter increment is 1km.
- On most systems, each tick of the mouse scrollwheel equals ten increments.
- Holding shift will change each mouse scrollwheel tick to a single increment.
- The + or - keys will increment the same as the mouse scrollwheel.
- Holding the control key (Crtl) down while using the + or - keys will change to a single increment.
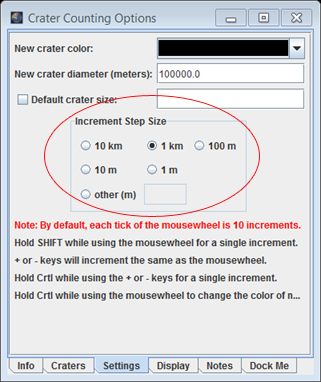
- Users can change the diameter increment step size in the "Settings" tab in the Crater Counting Layer's focus panel.
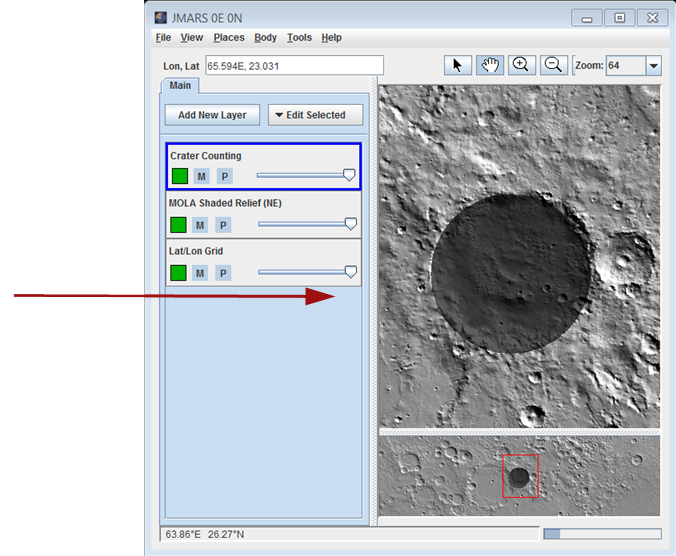
- Entering a Crater Marker: Once the correct diameter has been selected, the marker can be entered into the "Crater Counting" Layer tab by clicking in the Main View. An entry for the marker will be added to the table in the "Craters" tab of the focus panel.
Marking Craters using the Three Point Method
In addition to marking craters using a variable radius circle, craters may be marked by clicking three points along the rim of the crater to be marked.
- Switch to Three Point Mode: In the Main View, right click and choose "Crater mode", then select "Three point mode".
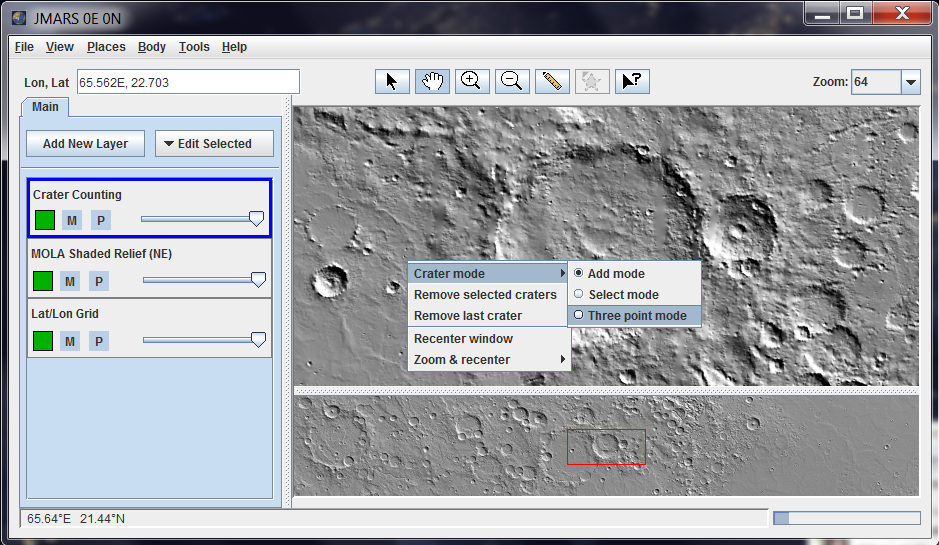
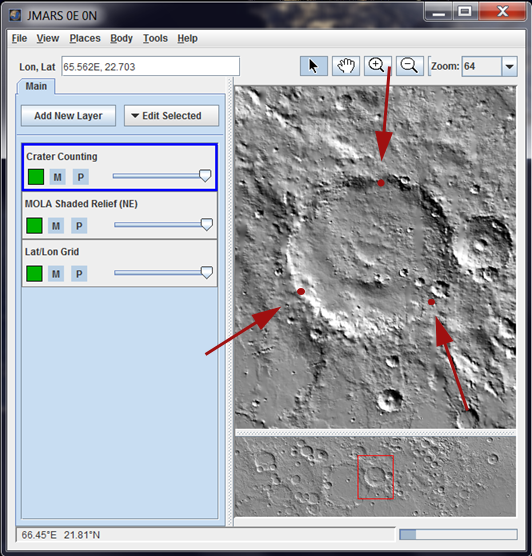
- Mark a Crater: Select a point along the rim of a crater to be marked. Left click with the mouse. A small red circle will appear where you clicked. Click two additional points along the rim of the crater. After the third click, the crater will be marked and an entry for the marker will be added to the table in the "Craters" tab of the "Crater Counting" focus panel.
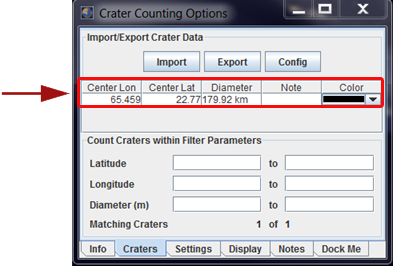
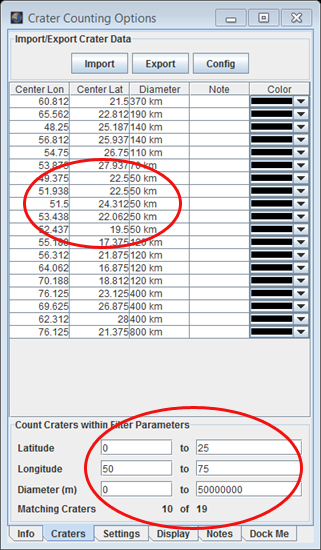
Counting Craters within Parameters
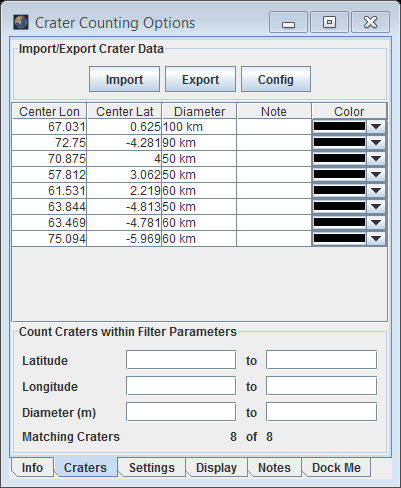
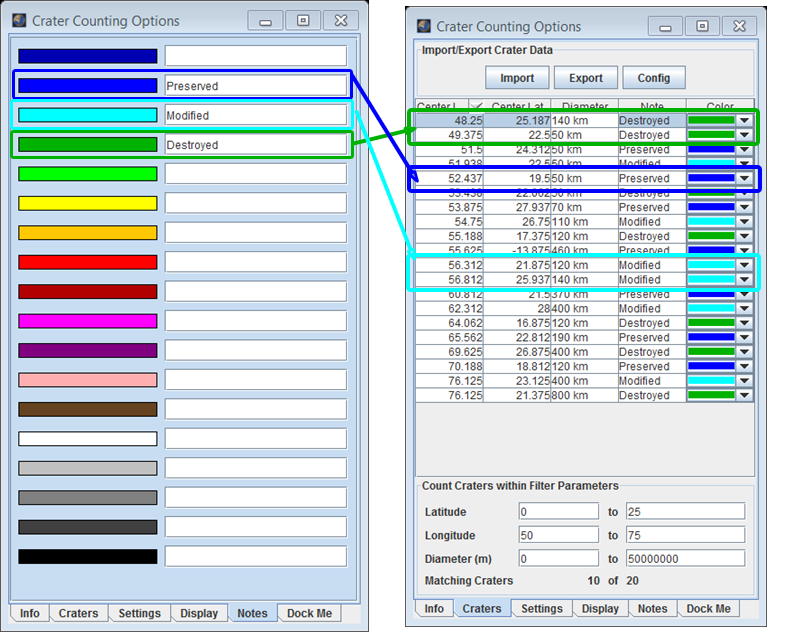
Depending on the study being performed, it may be useful to automatically count how many craters fall within a given range of parameters. Users can perform basic searches by entering minimum and maximum values for Latitude, Longitude and Diameter at the bottom of the "Craters" tab in the Crater Counting Layer's focus panel. The number of marked craters matching the criteria will be output at the bottom of the tab.
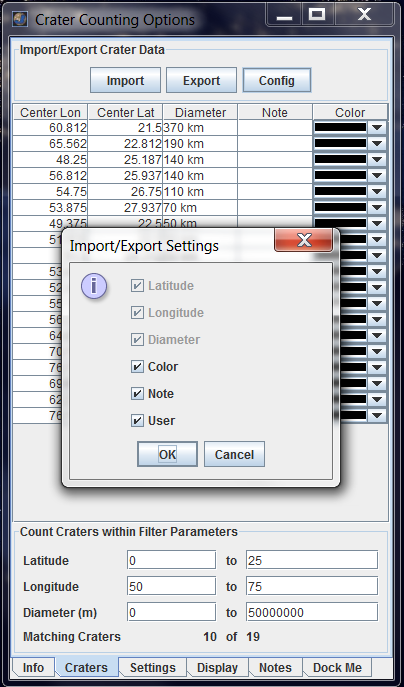
Configuration for Exporting Crater Markers
The user has the option to filter the counted crater data that can be exported to a file. While the latitude, longitude, and diameter data are required for export, the user may choose to exclude notes (comments), colors, or their user id from the export file.
- In the Craters tab of the focus panel, click "Config"
- Check or uncheck any or all of the settings for "Color", "Note", or "User".
- Click "OK" to accept the changes or "Cancel" to accept the defaults (all table columns are exported).
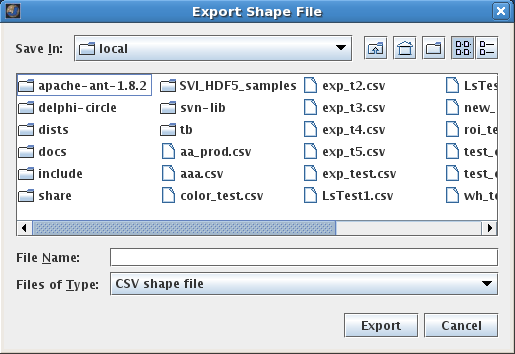
Saving (Exporting) Crater Markers
- In the "Craters" tab of the focus panel, click "Export"
- Choose a location to save the file, assign the file a name and set a file type (ESRI or CSV).
- Click "Save"
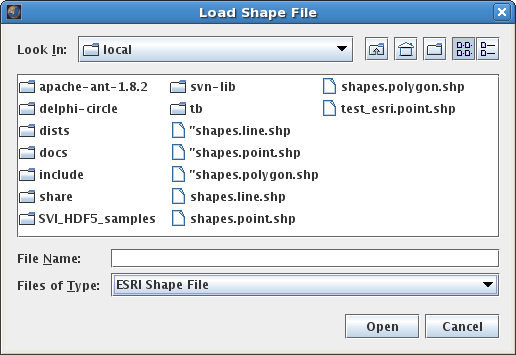
Loading (Importing) Crater Markers
- In the "Craters" tab of the focus panel, click "Import"
- Choose a previously-created Crater Counting Layer shape file (ESRI or CSV) to load.
- Click "Load"
Adjusting the Layer Settings
Under the "Settings" tab in the Crater Counting Layer's focus panel, users can change many of the layer's default settings.
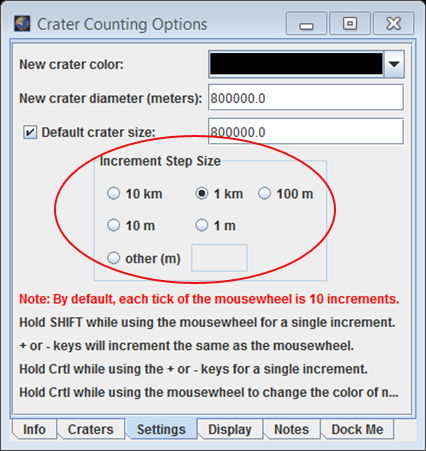
- Change Marked Crater Color: Users can choose from any of the colors available in the "New crater color:" pull-down menu.

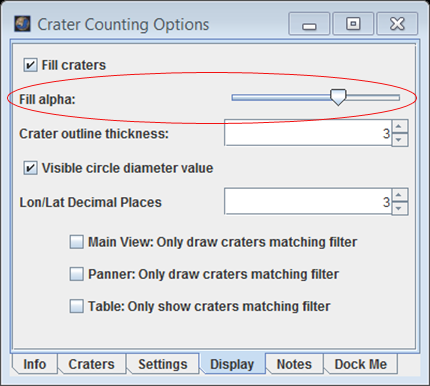
- Change Crater Marking Circle Transparency: The transparency of the circle markers can be adjusted using the "Fill Alpha:" slide bar.
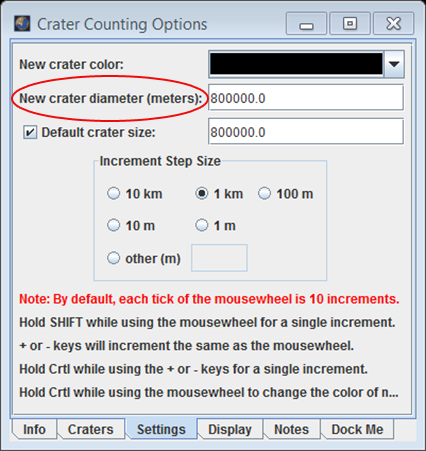
- Manually Change New Crater Diameter: By default, the starting diameter of a crater marker is the diameter of the last crater marker entered. If users want to manually change this value, they can do so using the "New crater diameter (meters):" input field.
- Note: Be sure to enter values in meters and not in kilometers!
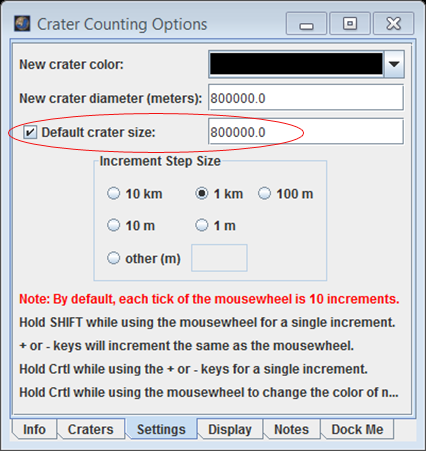
- Use a Default Crater Size: Users may wish to use a default crater diameter for the next crater to be marked. For example, a user may wish to count 100 km diameter craters, but occasionally mark larger or smaller craters in the same marking session. In this case the user would set the crater diameter with the mouse scrollwheel or by entering a new crater diameter into the "New crater diameter (meters):" input field. Then while marking craters, if they decide to mark a larger or smaller crater, they would check the "Default crater size:" checkbox, either input a new crater diameter in the "New crater diameter (meters):" input field or select a new diameter with the mouse scrollwheel, and mark the larger or smaller crater. The "New crater diameter (meters):" input field would then be automatically reset to the value of "Default crater size:" for the next crater to be marked. The user may also manually enter the default crater diameter and then check the "Default Crater Size" checkbox.
- Note: Be sure to enter values in meters and not in kilometers!
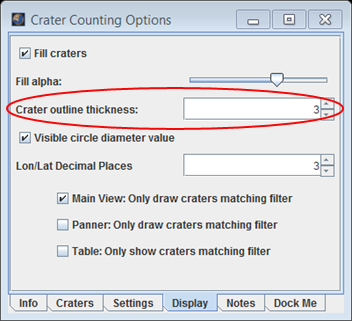
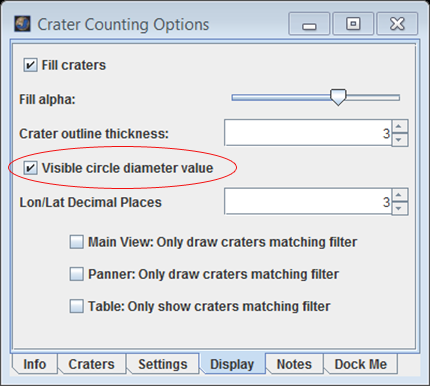
- Select the Outline Thickness of the Crater Marking Circle : Users can choose to make the outline thickness of the crater marking circle be thinner or thicker by scrolling through the choices provided by the "Crater outline thickness:" selection field until the desired outline thickness is found.
- Display the Crater Marking Diameter in the Main View: Users may wish to either display or hide the diameter of the next crater to be marked by checking or unchecking the "Visible circle diameter value" checkbox.
- Change Diameter Increment Size: Users can choose from the standard diameter increments of 10km, 1km, 100m, 10m, 1m or they can specify their own.
- Selective Display of Filtered Craters: Users may select which areas of the application will display filtered craters .
- MainView
- Panner
- Table

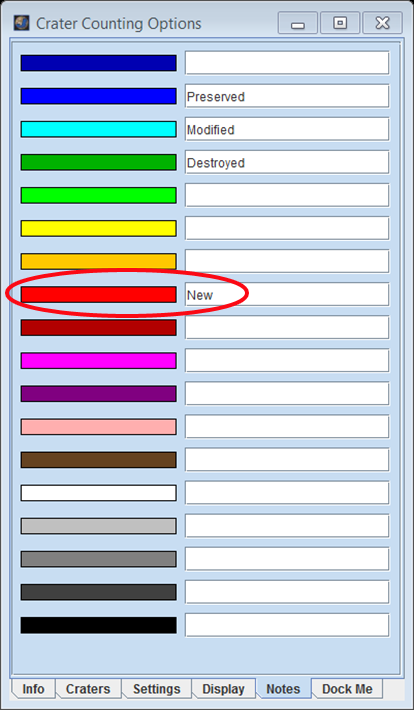
Using the Colors Tab
Different circle colors can be used in the Main View to represent different types of craters (ie: preserved/modified/destroyed). Using the "Colors" tab in the Crater Counting Layer's focus panel, users can assign a note or value to each available color (ie: blue=preserved, green=modified, etc). Then, when users enter crater markers of those colors in the Main View, the Crater Counting Layer will not only record the location and diameter of the crater, but also the note that was assigned to all crater markers of that color. Those comments are preserved when the output files are imported/exported.
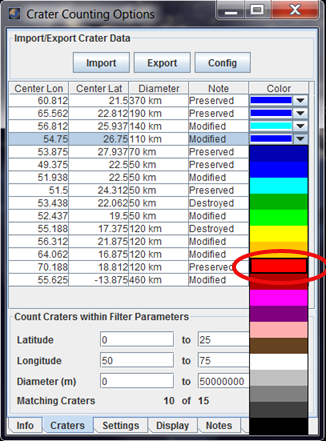
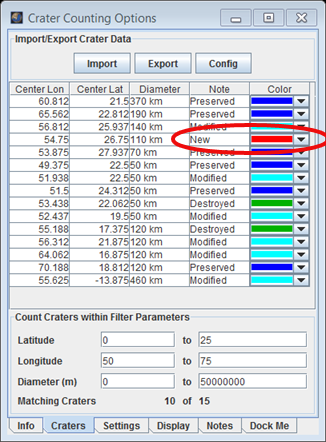
Using Colors in the Craters Tab
Crater marker colors can be changed on a crater-by-crater basis in the "Craters" tab of the Crater Counting Layer's focus panel. When changing crater marker colors using this method, the note (if any have been assigned) associated with the new crater color in the "Colors" tab will be automatically associated with the crater marker in the "Craters" tab.