
- Home
- Getting Started
- Documentation
- Release Notes
- Tour the Interface
- Tour the Layers
- JMARS Video Tutorials
- Lat/Lon Grid Layer
- Map Scalebar
- Nomenclature
- Crater Counting
- 3D
- Shape Layer
- Mosaics
- Map
- Advanced/Custom Maps
- Graphic/Numeric Maps
- Custom Map Sharing
- Stamp
- THEMIS
- MOC
- Viking
- CRISM Stamp Layer
- CTX
- HiRise
- HiRISE Anaglyph
- HiRISE DTM
- HRSC
- OMEGA
- Region of Interest
- TES
- THEMIS Planning
- Investigate Layer
- Landing Site Layer
- Tutorials
- Video Tutorials
- Displaying the Main View in 3D
- Finding THEMIS Observation Opportunities
- Submitting a THEMIS Region of Interest
- Loading a Custom Map
- Viewing TES Data in JMARS
- Using the Shape Layer
- Shape Layer: Intersect, Merge, and Subtract polygons from each other
- Shape Layer: Ellipse Drawing
- Shape Layer: Selecting a non-default column for circle-radius
- Shape Layer: Selecting a non-default column for fill-color
- Shape Layer: Add a Map Sampling Column
- Shape Layer: Adding a new color column based on the values of a radius column
- Shape Layer: Using Expressions
- Using JMARS for MSIP
- Introduction to SHARAD Radargrams
- Creating Numeric Maps
- Proxy/Firewall
- JMARS Shortcut Keys
- JMARS Data Submission
- FAQ
- Open Source
- References
- Social Media
- Podcasts/Demos
- Download JMARS
Advanced/Custom Maps
The Advanced/Custom Maps Layer allows users to configure a given map and also allows a user to load custom-built maps into JMARS. Once loaded, these maps can be used in conjunction with other JMARS layers (ie: Stamp Layer, ROI Layer, etc) as if they were one of the default JMARS maps.

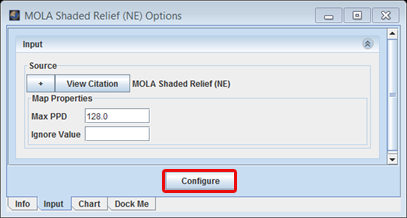
There are two ways to come across the "Map Layer Settings" window:
- By clicking on the configure button appearing in the focus panel of any map.
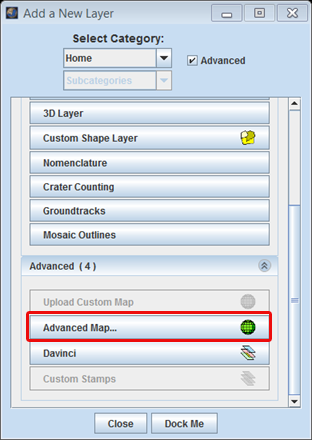
- By Add New Layer → Advanced map.
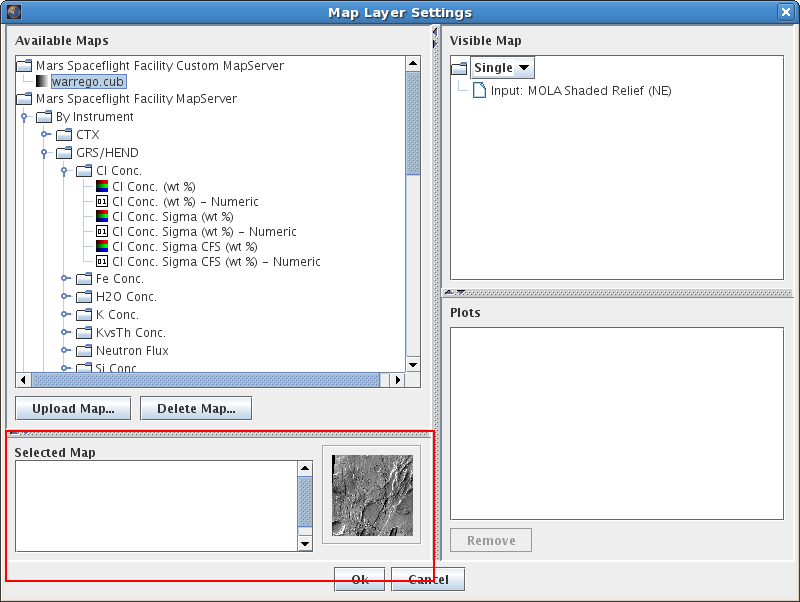
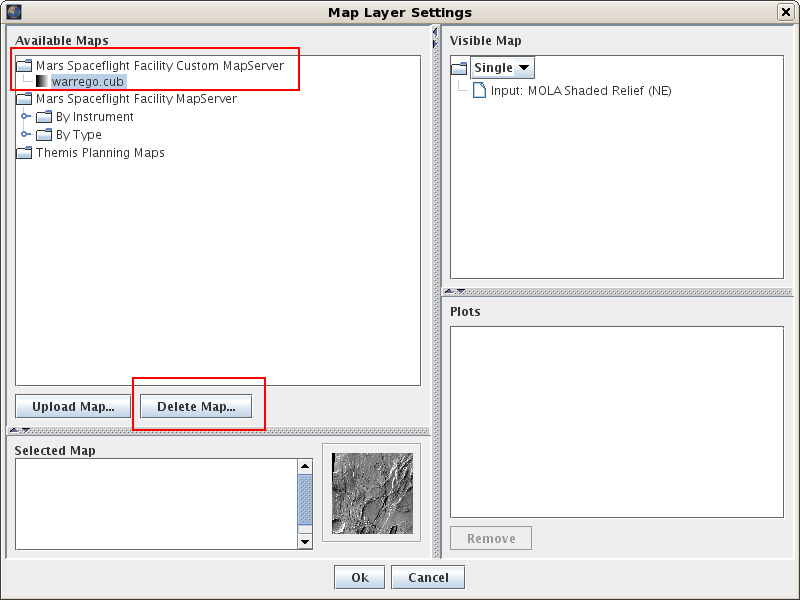
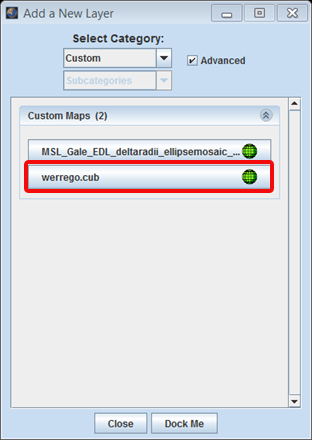
- The Available Map section consists of all the maps in all the map servers appearing in a tree like structure.If a custom map has been added then it will come up under "Mars Spaceflight Facility Custom MapServer" as shown below where "warrengo.cub" is the Custom Map.For uploading a custom map user has to click on the "Upload Map" button.
- The type of image is represented by the icon preceeding it.
 image indicates that the map is an numeric map ,
  image indicates that the map is an colorized map and the
  image indicates that the map is a grayscale map.If a map fails to load then it will be shown with a
  symbol preceeding it.When a map is accessed for the very first time by an user a
  image comes up. Jmars then queries the map server for the map type and then updates the image icon with the appropriate image.

- The "Selected map" section consists of a description and image for the selected map.Jmars takes the image from a predefined location point in a map.If image/data is not present for that location then a image will not come up.
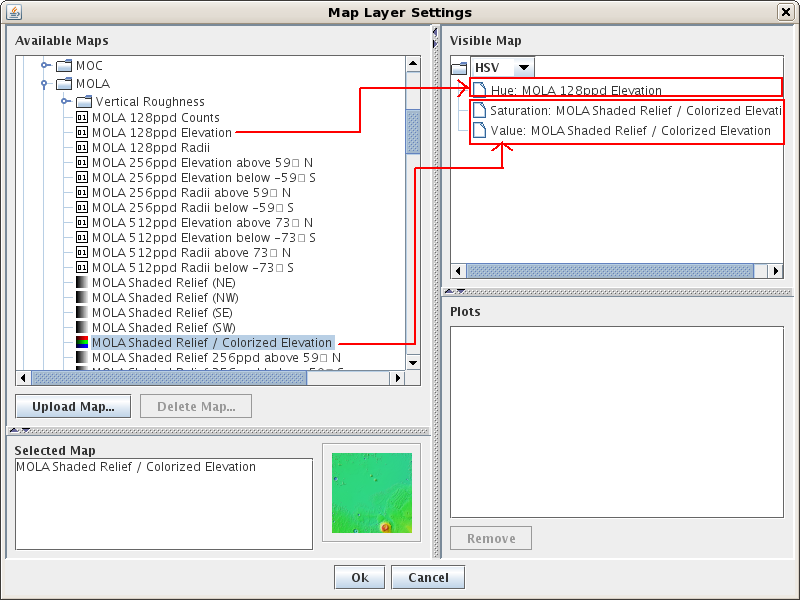
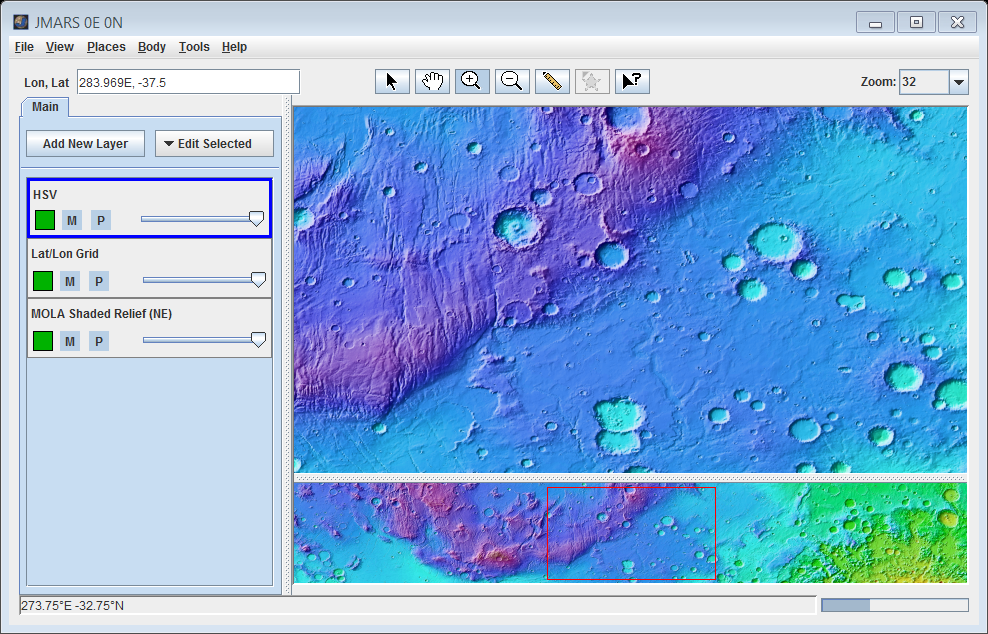
- A user can view a combination of maps in the HSV and RGB composite modes. These modes are available in the Visible section of the maps.
- A user can add one map as Hue in the input section by dragging the map from Available Maps section and placing it under Hue. Similar for Saturation and value.
- If the map added in the input section is a numeric map, then Jmars will take the value of the map.If the map added is a colorized map then the data from the corresponding channel of the map is taken.In the screen-shot shown above,Hue is taking the elevation data of numeric map “MOLA 128ppd Elevation”,Saturation is talking the value from the saturation channel of colorized map “MOLA Shaded Relief/Colorized Elevation” and Value field is taking its data from the value channel from the colorized map “MOLA Shaded Relief/Colorized Elevation”.
- After clicking on the OK button we get the HSV map.The combination of maps used for the image below are the same as used in the screen-shot above.


Load a Custom Map into JMARS
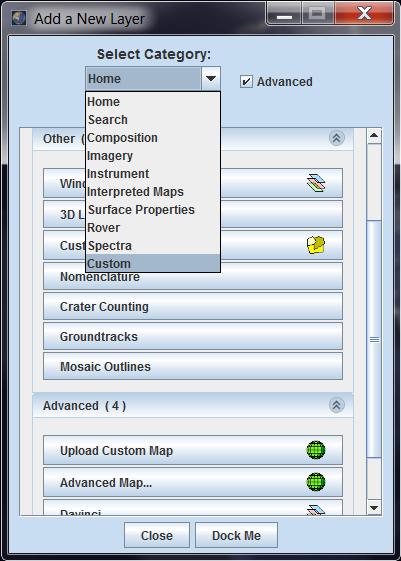
- Open the Advanced/Custom Map Layer: Choose "Add New Layer" -> "Advanced Map"
- Upload a Map: In the "Available Maps" section (shown below) of the pop-up box, click "Upload Map".
- There are currently a few limitations on the types of custom maps users can upload to JMARS:
- The custom map file cannot be more than 512MB in size.
- Alpha transparency bands are not yet supported.
- The file must be in ISIS cub, Vicar, JPEG, TIFF, PNG, or PNM format.
- In the "Upload File" pop-up box, users must input some basic parameters for the map they are uploading:
- Step 1: Enter the path or url of the map.
- Step 2: Enter a name for the map (This name will be given to out map menu.Default is the file name).
- Step 3: Select Global map or regional map if the file is of type Vicar,JPEG,TIFF,PNG or PNM.For these file types a user also needs to put in values for the latitude/longitude bounding box of the mosiac.If the file is an ISIS cub file then it already has this bounding data embedded in it and no information needs to be entered in step 3.
- Step 4: Many of the global maps have gaps where the given instrument did not collect good quality data. If you want these areas to appear transparent in JMARS, then you need to set the ignore value to the value of the blank pixels in the gaps.Enter the map's ignore value, if there is one.
- If the the "Email when Ready" checkbox is selected then you don't have to wait for the map to load. You will get an email when the map is ready. When you log back into the system the map will be ready for you.
- If the the "Email when Ready" checkbox is selected then you don't have to wait for the map to load. You will get an email when the map is ready. When you log back into the system the map will be ready for you.


- When the upload is complete, an icon with the title of the custom map should appear under "Mars Space Flight Facility Custom Mapserver" in the Available Maps section.
- If not, double click on the "Mars Space Flight Facility Custom Map Server" option in the "Available Maps" section to see all custom maps uploaded under your user name.
- You can also delete the custom map you loaded by clicking on the "Delete Map" button
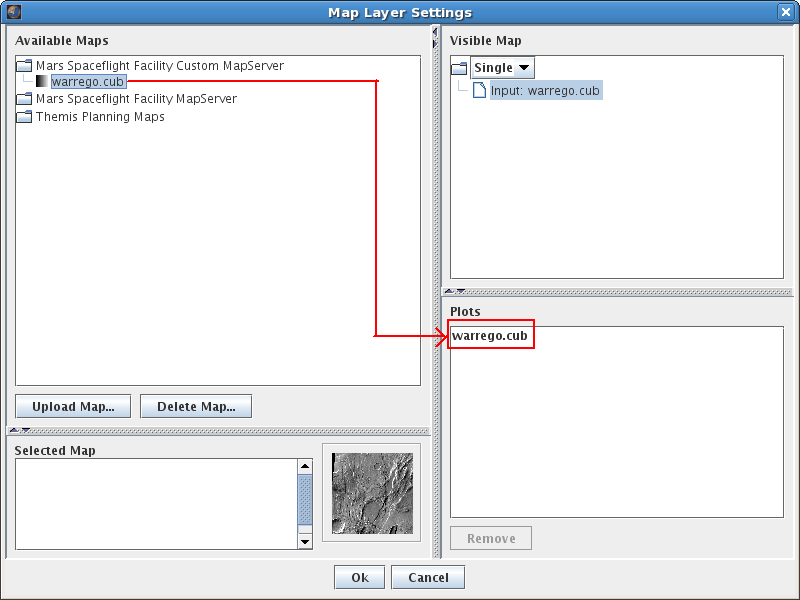
- (i) Load the Map into JMARS: Left-click on the name of the custom map you want to display, drag it into the "Visible Map" section and drop it on top of the word "Input". Then click "Ok" to view the map in JMARS.
- If you are loading a custom numeric map and you want to plot data along a profile line, you must also left-click and drag the map name into the "Plots" section.

(ii) Edit Custom Map Settings:
- Adjust Map Position: If the custom map did not load in the correct position, but is relatively close to it, click on the tab named after the custom map in the Layer Manager. Use the arrows in the "Nudge Map" section to adjust the map's position.

- The step size is the number of pixels that the map will be moved for each arrow click. It can be changed to either 1,2,5 or 10 using the drop-down menu.
- The "Reset" button will return the custom map to its original position.
- If you are loading a custom numeric map and you want to plot data along a profile line, you must also left-click and drag the map name into the "Plots" section.
- Edit Advanced Map Settings: In the Layer Manager, click on the tab named after the custom map, then click on the "Configuration" button at the bottom. The Map Layer settings window will appear and give you the editable configurations of the map.
Load a Previously Uploaded Custom Map
Once a user has uploaded a custom map, it will be available under their user name until it is deleted. To load a previously uploaded custom map:
- In the Layer Manager, choose "Add New Layer" -> Click the drop-down menu and select "Custom" -> Custom Map Name
- Users then have the option to choose either "Load Graphic" or any of the other map loading options.


Related Pages
Tutorial #5: Loading a Custom Map