- Home
- Getting Started
- Documentation
- Release Notes
- Tour the Interface
- Tour the Layers
- JMARS Video Tutorials
- Lat/Lon Grid Layer
- Map Scalebar
- Nomenclature
- Crater Counting
- 3D
- Shape Layer
- Mosaics
- Map
- Advanced/Custom Maps
- Graphic/Numeric Maps
- Custom Map Sharing
- Stamp
- THEMIS
- MOC
- Viking
- CRISM Stamp Layer
- CTX
- HiRise
- HiRISE Anaglyph
- HiRISE DTM
- HRSC
- OMEGA
- Region of Interest
- TES
- THEMIS Planning
- Investigate Layer
- Landing Site Layer
- Tutorials
- Video Tutorials
- Displaying the Main View in 3D
- Finding THEMIS Observation Opportunities
- Submitting a THEMIS Region of Interest
- Loading a Custom Map
- Viewing TES Data in JMARS
- Using the Shape Layer
- Shape Layer: Intersect, Merge, and Subtract polygons from each other
- Shape Layer: Ellipse Drawing
- Shape Layer: Selecting a non-default column for circle-radius
- Shape Layer: Selecting a non-default column for fill-color
- Shape Layer: Add a Map Sampling Column
- Shape Layer: Adding a new color column based on the values of a radius column
- Shape Layer: Using Expressions
- Using JMARS for MSIP
- Introduction to SHARAD Radargrams
- Creating Numeric Maps
- Proxy/Firewall
- JMARS Shortcut Keys
- JMARS Data Submission
- FAQ
- Open Source
- References
- Social Media
- Podcasts/Demos
- Download JMARS
JMARS ›
Landing Site Layer
The Landing Site Layer allows users to pick areas that they believe will be good ellipse areas to land the 2020 rover. There are only two sizes available, 18x14km and 25x20km. Although there are only two sizes available the layer has a lot of similarities to the crater counting layer. Each ellipse can be changed as far as location, color and angle.
How to use it
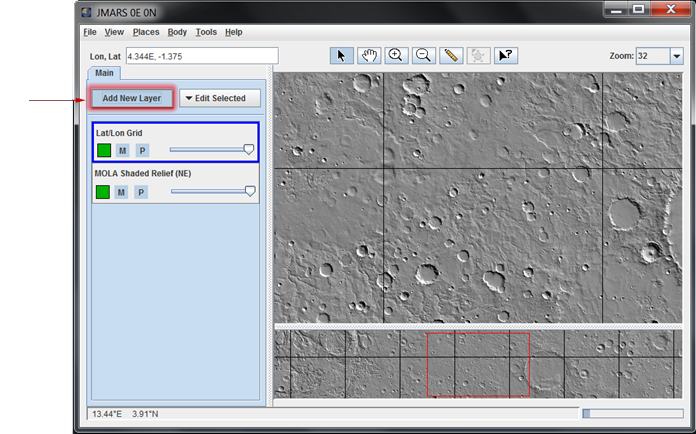
- Go to "Add New Layer" in the Layer Manager.
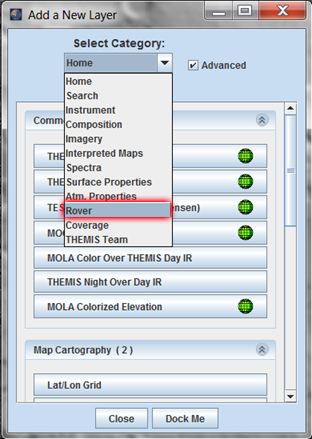
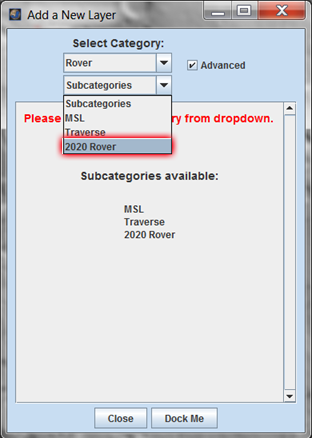
- Then click the tab and select "Rover". When the new screen pops up you will see "Subcategories". Click that tab and select "2020 Rover"
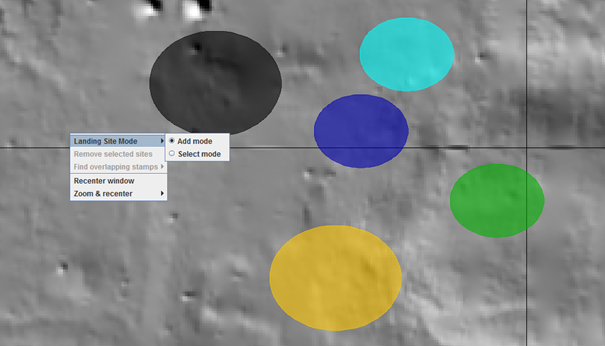
- After the Layer has been added to the Layer Manager, make sure it is selected and drag your mouse to the main view. Notice if you scroll your mouse wheel, the ellipse automatically changes between the 18x14km ellipse to the 25x20km ellipse.
Ellipse Options
- On the main view, create an ellipse by clicking your mouse.
- To change the color of the ellipse, hold down the control button and scroll your mouse wheel to pick a color. Then click the left mouse button to create the ellipse.
- You can select the craters and move them directly from the main view by right-clicking your mouse on the screen and selecting "Landing Site Mode" ->"Select Mode". You can also delete the crater this way. Select the crater you would like to remove, then right-click the screen and click "Remove Selected Sites"
- For more options double click the "Landing Site Ellipse" Layer under the layer manager. This opens more Ellipse options.
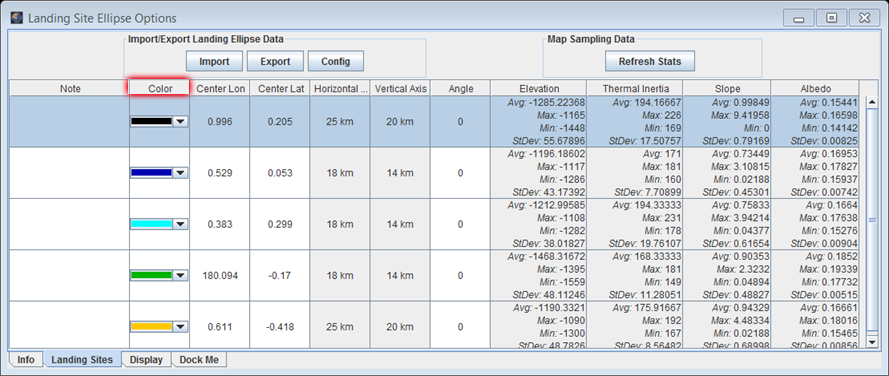
- The Landing Sites tab shows each ellipse that you have drawn in JMARS. You can change the color of the ellipse by selecting the color tab and selecting a new color.
- You may notice that there are some columns that are white and some that are colored. The white columns can be edited if you click on the value.
- If you change the angle of the ellipse, press enter after you put your new angle in and then press "Refresh Stats" to update the other columns. If you want the columns to display more or less decimal places, you can change that under the "Display" tab
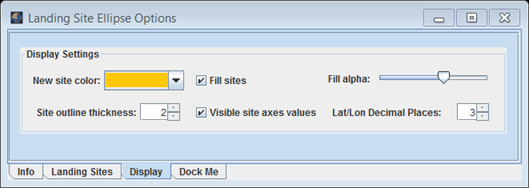
- The Display Tab: This tab allows you to change the transparency by changing the "Fill Alpha" bar. You can also change the thickness of the ellipse outline.

